Project Overview Page
The Project Overview page is the first page of your project. Here, viewers will get an idea of what your project is about. You can customize this page with a summary, image, and title.
Customizing your Overview Page
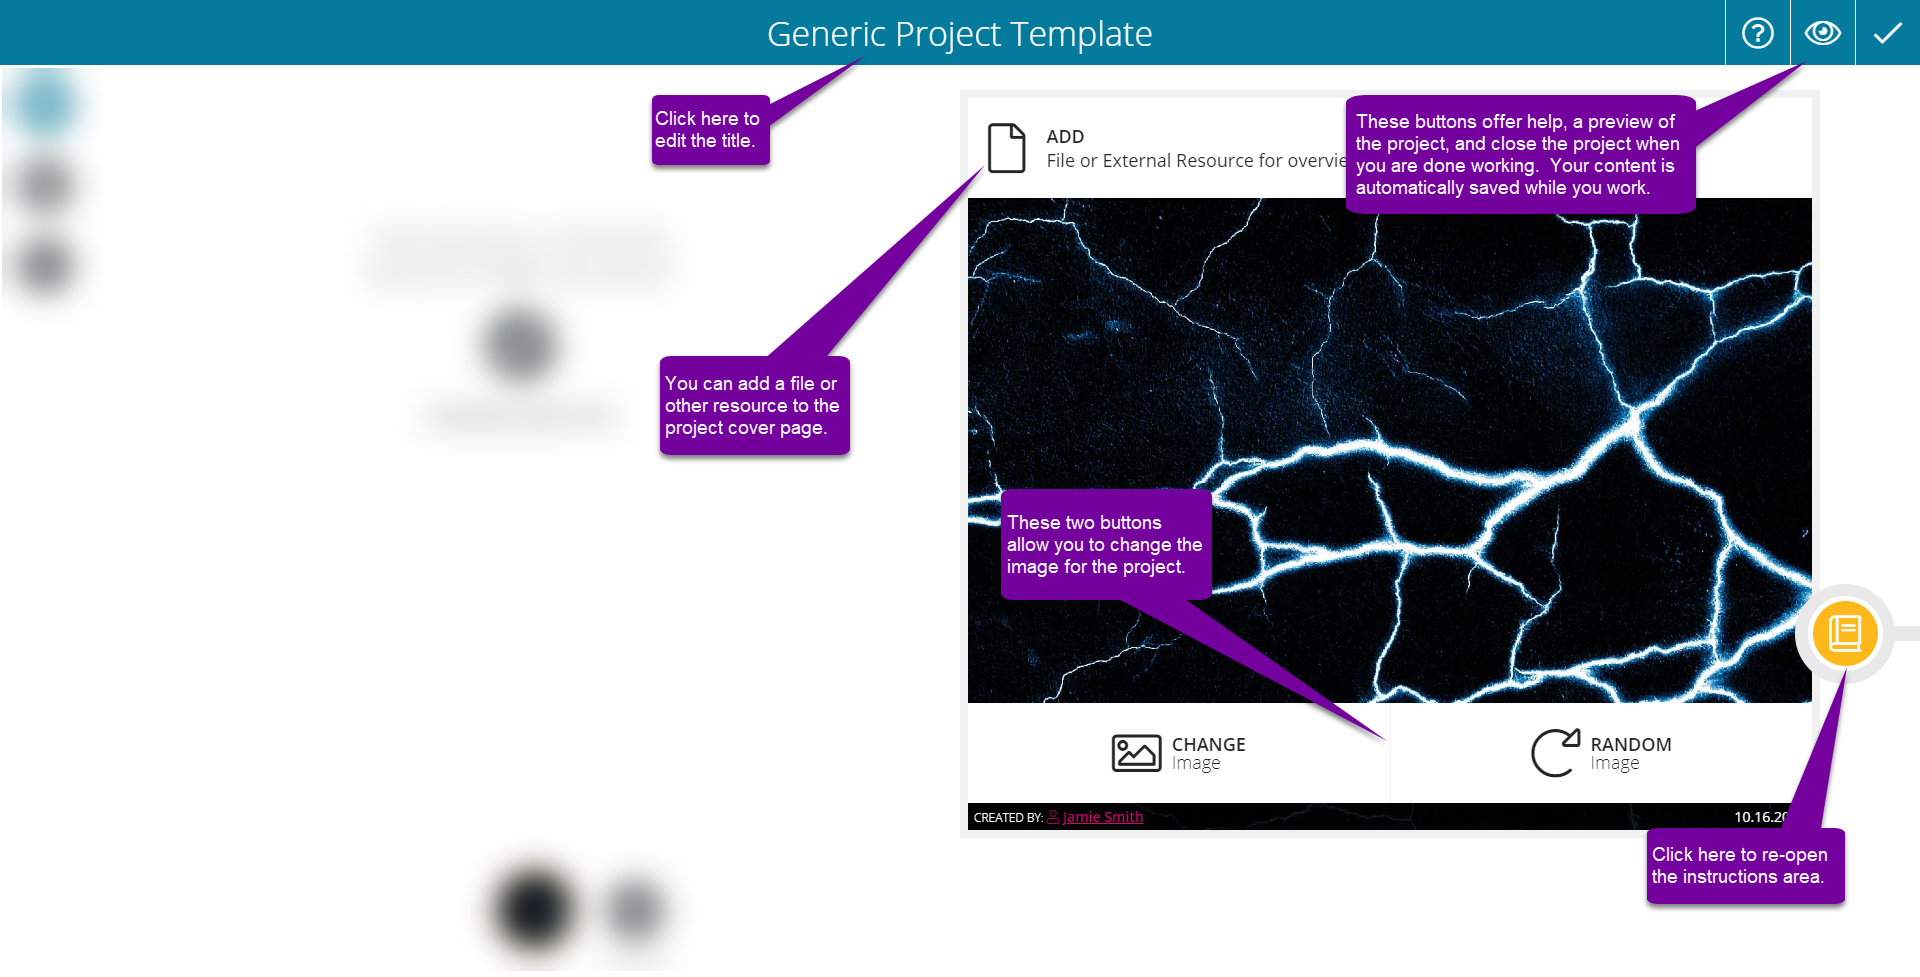
On the right half of this page, you can edit the project image. You can also use the yellow Notebook icon to access the informational page we saw when creating your project. This will be more useful for Community Projects which may contain customized instructions. The title of the project can be changed by clicking on the default title and typing a new one. To save your project and stop working on it, click on the checkmark in the top right.
On the left half of this page, you have the ability to add a summary, new pages, reflections, and tags to your project.
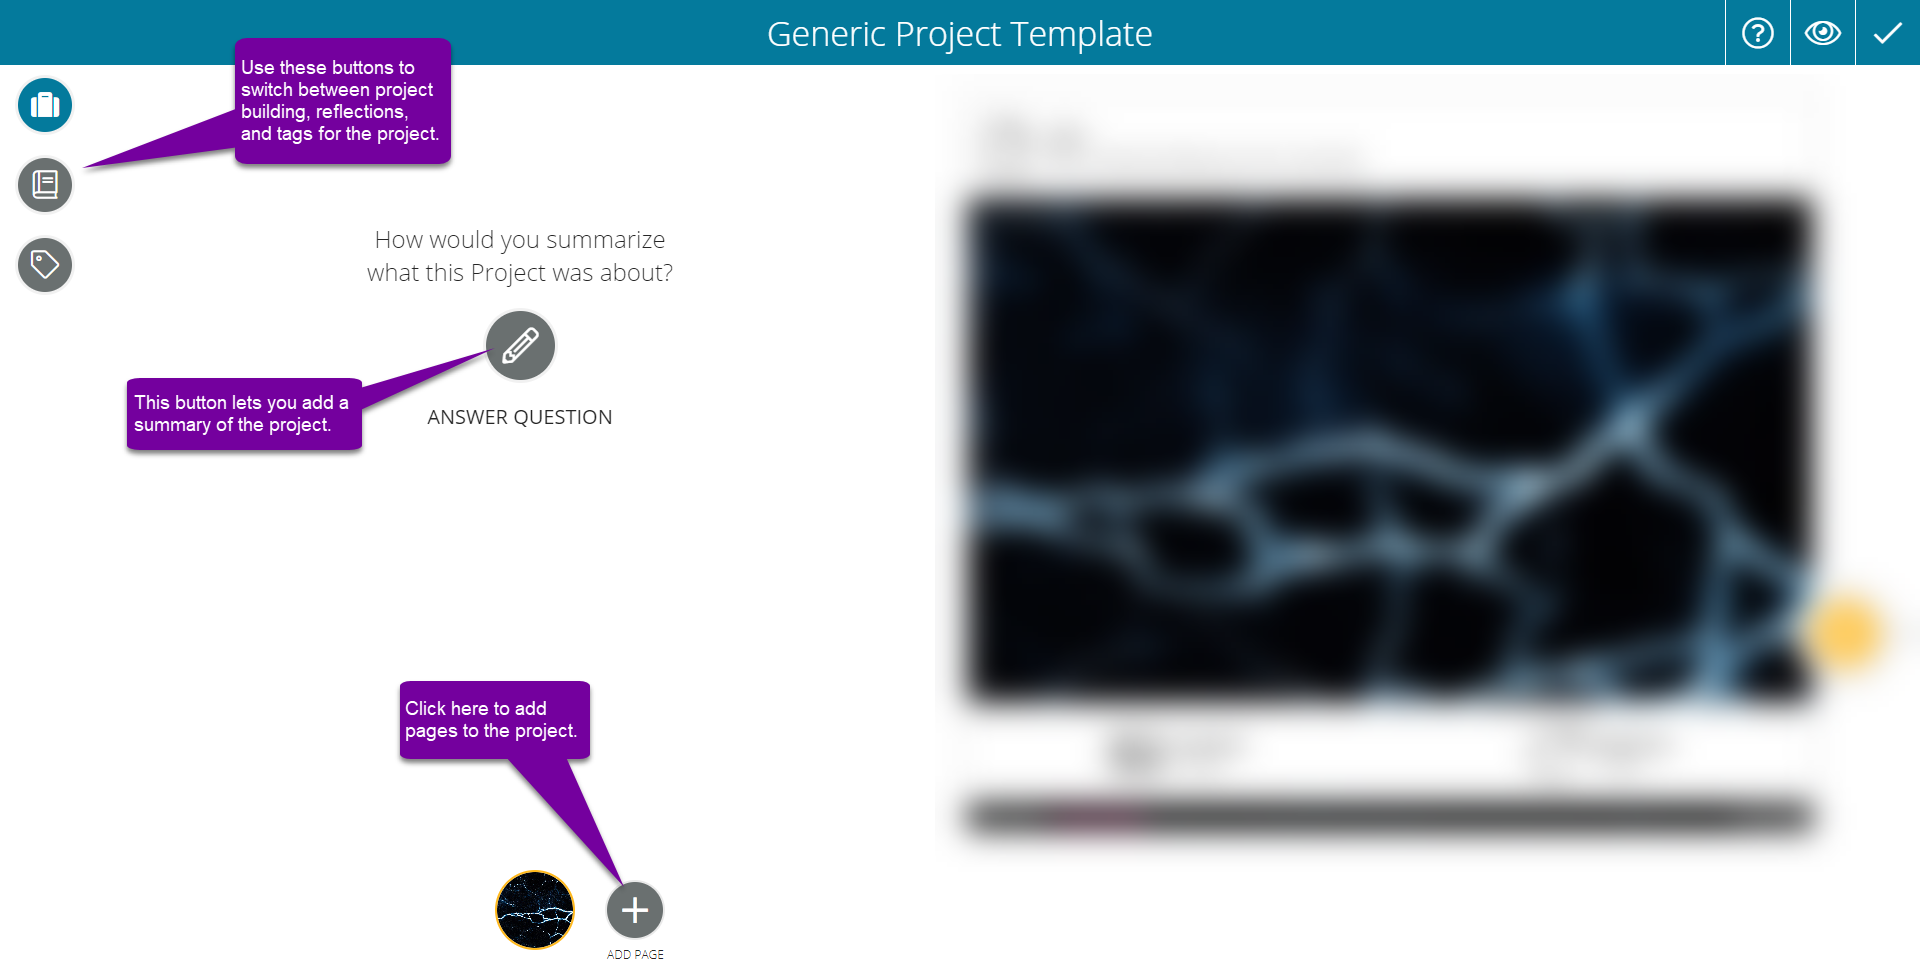
You can add reflections to your project by clicking on the gray Notebook icon in the top left. Here you will see a list of generic questions to reflect on. These can help you in the process of building your project. Click on one to answer it!
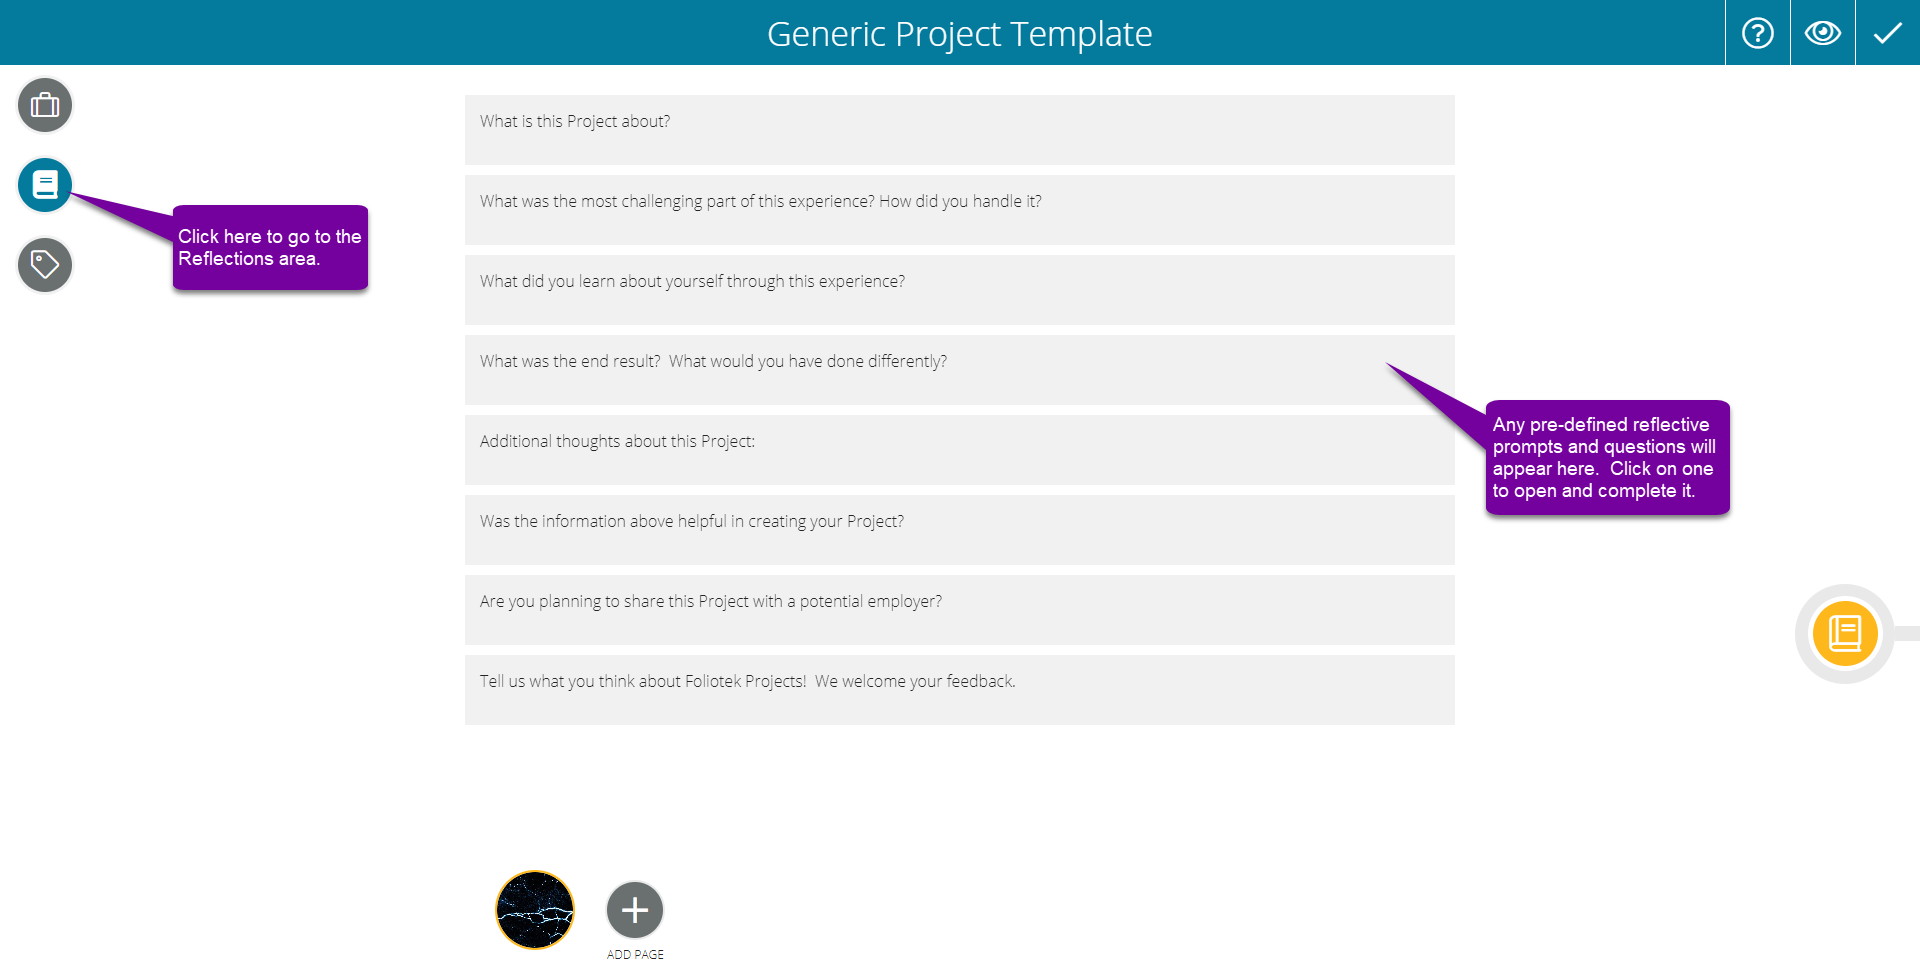
You can enter your reflections here. Once you are finished, you can decide whether you want your reflection published. Reflections that are published will be visible to anyone viewing your project. Save your changes using the checkmark icon in the upper-right corner.

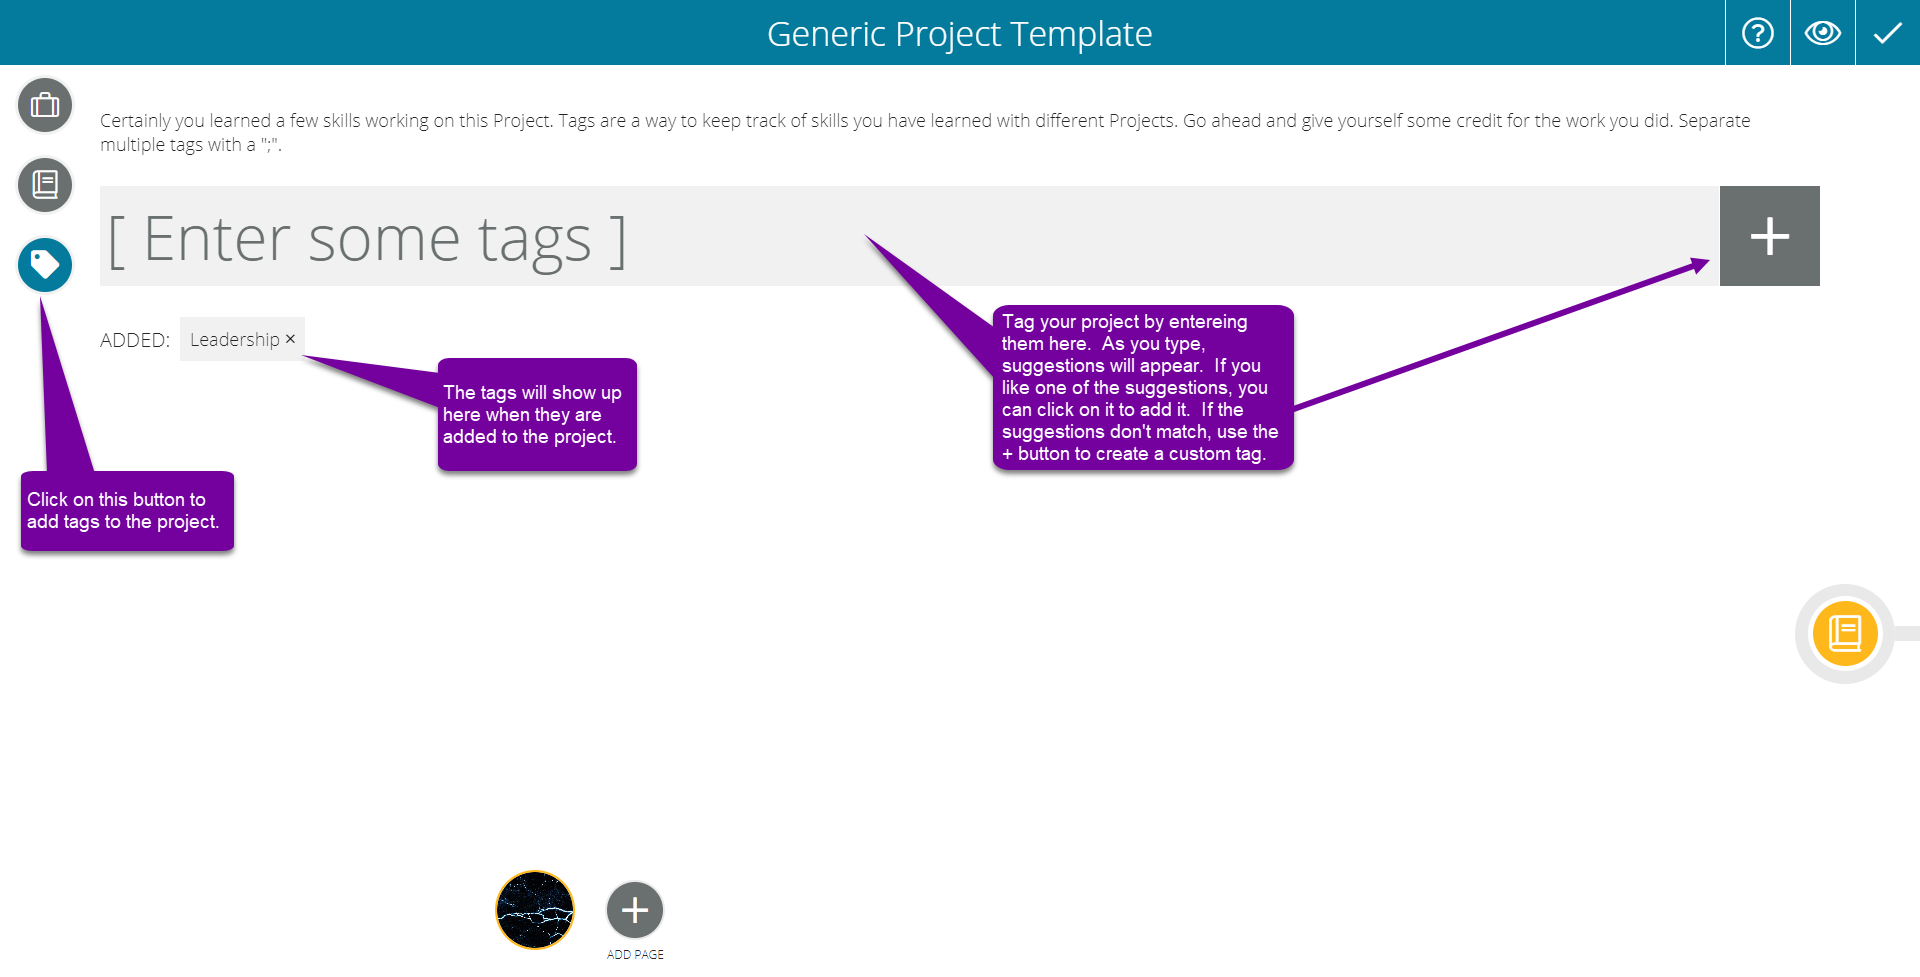
Finally, you can add tags using the Tag icon in the top left under the Reflections icon. Click into the Enter some tags box and enter your first tag. Then use the Plus icon on the right to add a tag. All of your tags will appear below the box and on your dashboard.