Adding Projects to a Portfolio
Projects are a great way to supplement your portfolios. You can easily add projects to a portfolio in two ways. The first way is to use the Projects Gizmo in the portfolio editor. You can find instructions for doing that here. The second way, described below, is to add the project through the Files area.
Go to the Portfolio Editor
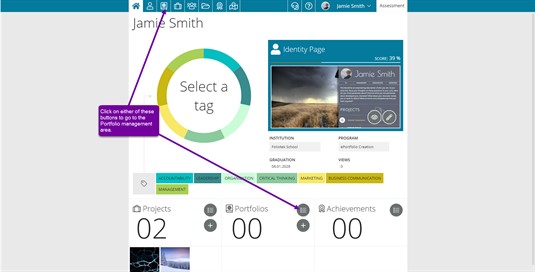
From the dashboard, click on one of the Portfolio Management icon.
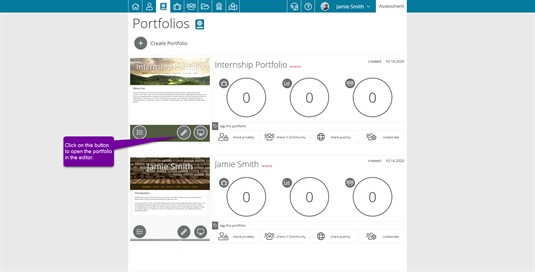
Next, click on the Pencil icon to edit your portfolio.
Add your Project
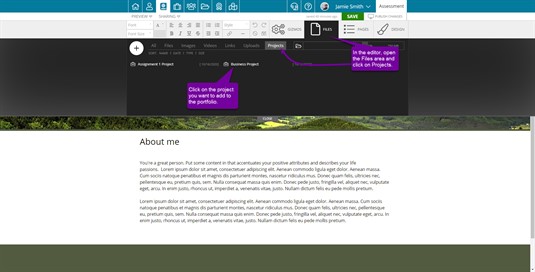
One way to add a project is from the Files tab. To do this, click on the Files button in the gray toolbar. Your project will be listed as one of your files. Sort your files by Projects to easily find any projects you have created.
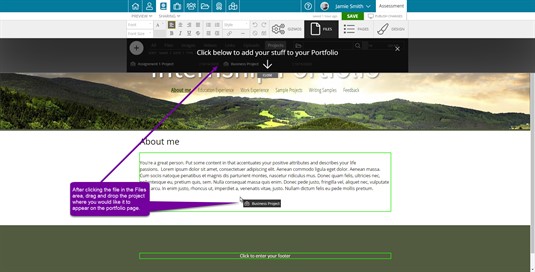
Select the project and then place it on your portfolio. Move the cursor to the spot on the page where you would like to place the project and click to drop the project onto the page.
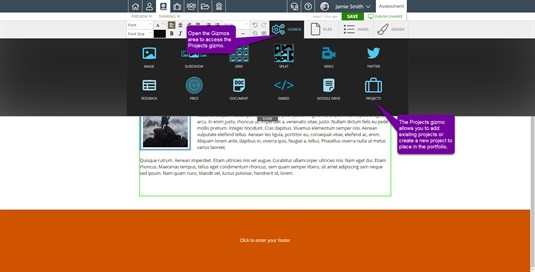
The other way to add a project to your portfolio is through the Projects gizmo. You can find the Projects gizmo by clicking the Gizmos tab in the portfolio editor.
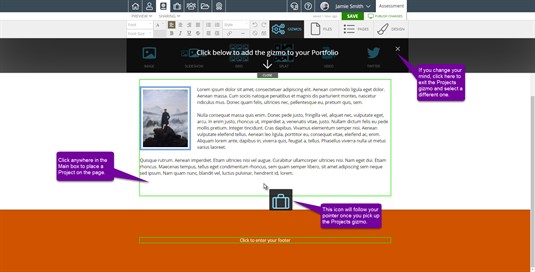
After clicking the Projects gizmo, you can now place the gizmo into the portfolio page. Move the cursor to the spot where you would like the project to appear and click to drop the gizmo into the page.
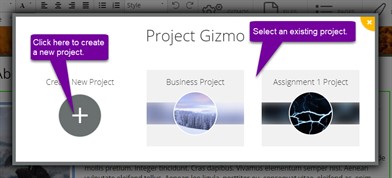
Next, a modal will appear with a listing of all of your projects. Select the one you would like to place on the portfolio page. If you haven't created that project yet, you can click the Create New Project button and start working on the project you need.
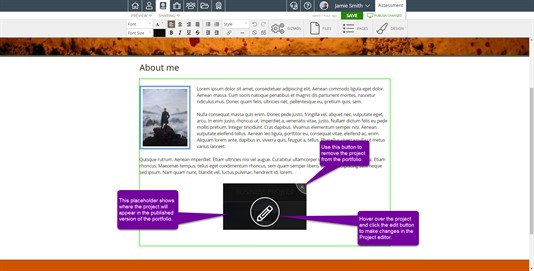
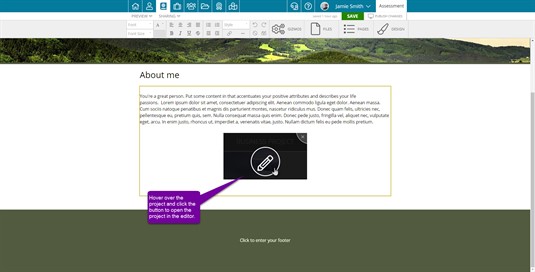
After selecting a project, or creating a new one, a placeholder will be add to the portfolio page to show you where the project will appear. You can move the placeholder to different locations to experiment with different layouts. You can also open the project in the project editor by clicking on the edit button on the placeholder.
Editing your Project
You can edit your project by moving your mouse over it and clicking on the Pencil icon. This will bring up the project editor.
