Grid Gizmo
The Grid gizmo allows you to add multiple images into one location within the content of your portfolio. You select the images you would like to include and determine the look of the grid using the various options available. The grid is great for displaying multiple images in your portfolio.
Creating a Grid
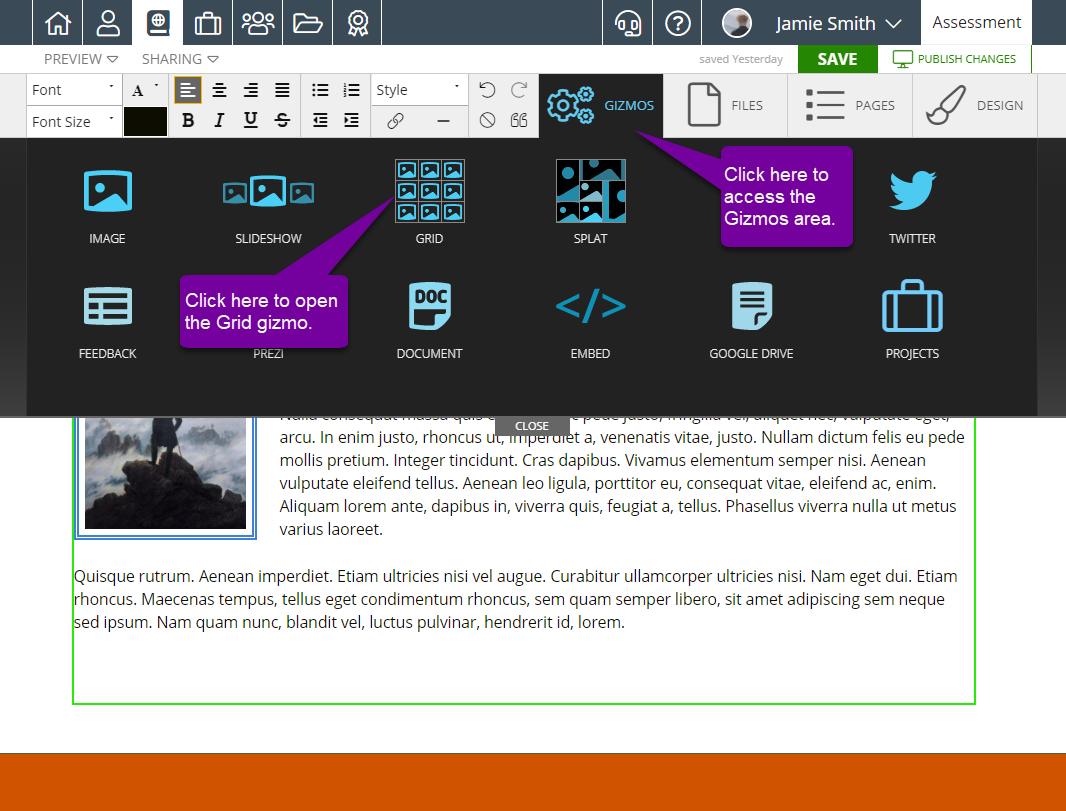
Creating a grid is very easy. Simply click on the Gizmos tab at the top of the portfolio editor. When the Gizmos area opens, click on the Grid icon.
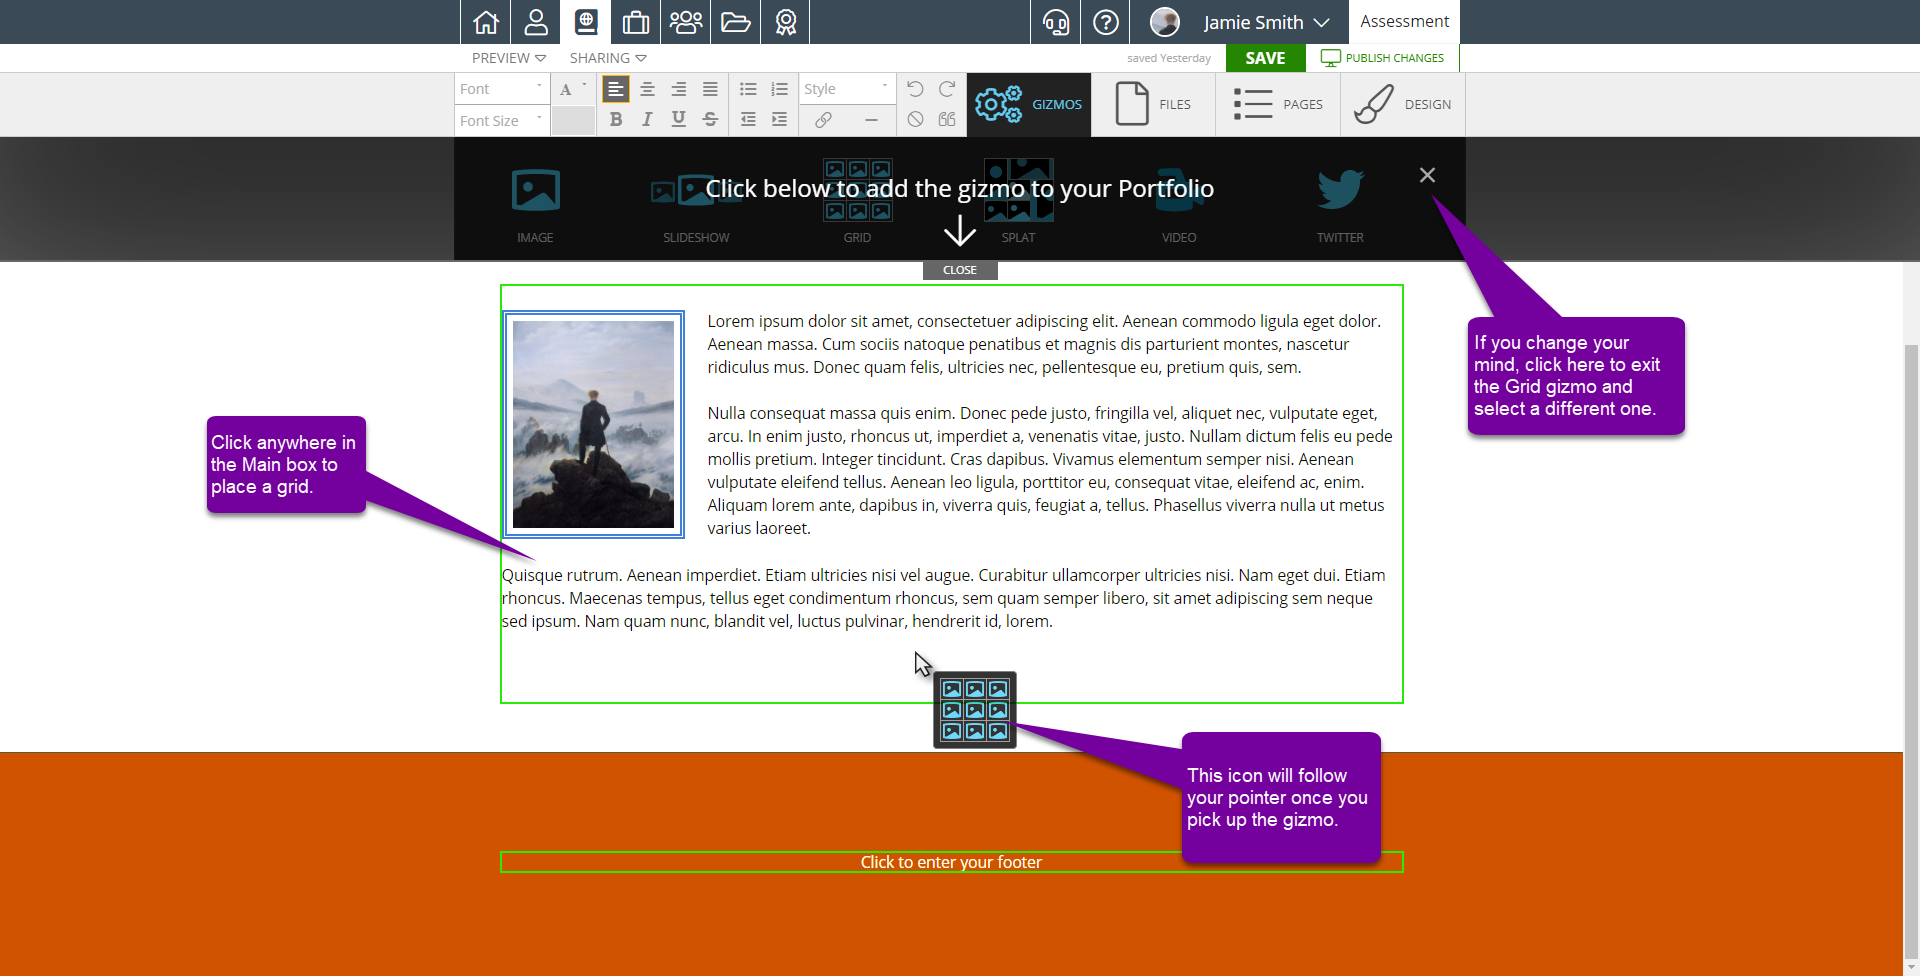
Next, click into the content page where you would like the grid to appear. This will place the gizmo in the page and open up the Create Grid modal.
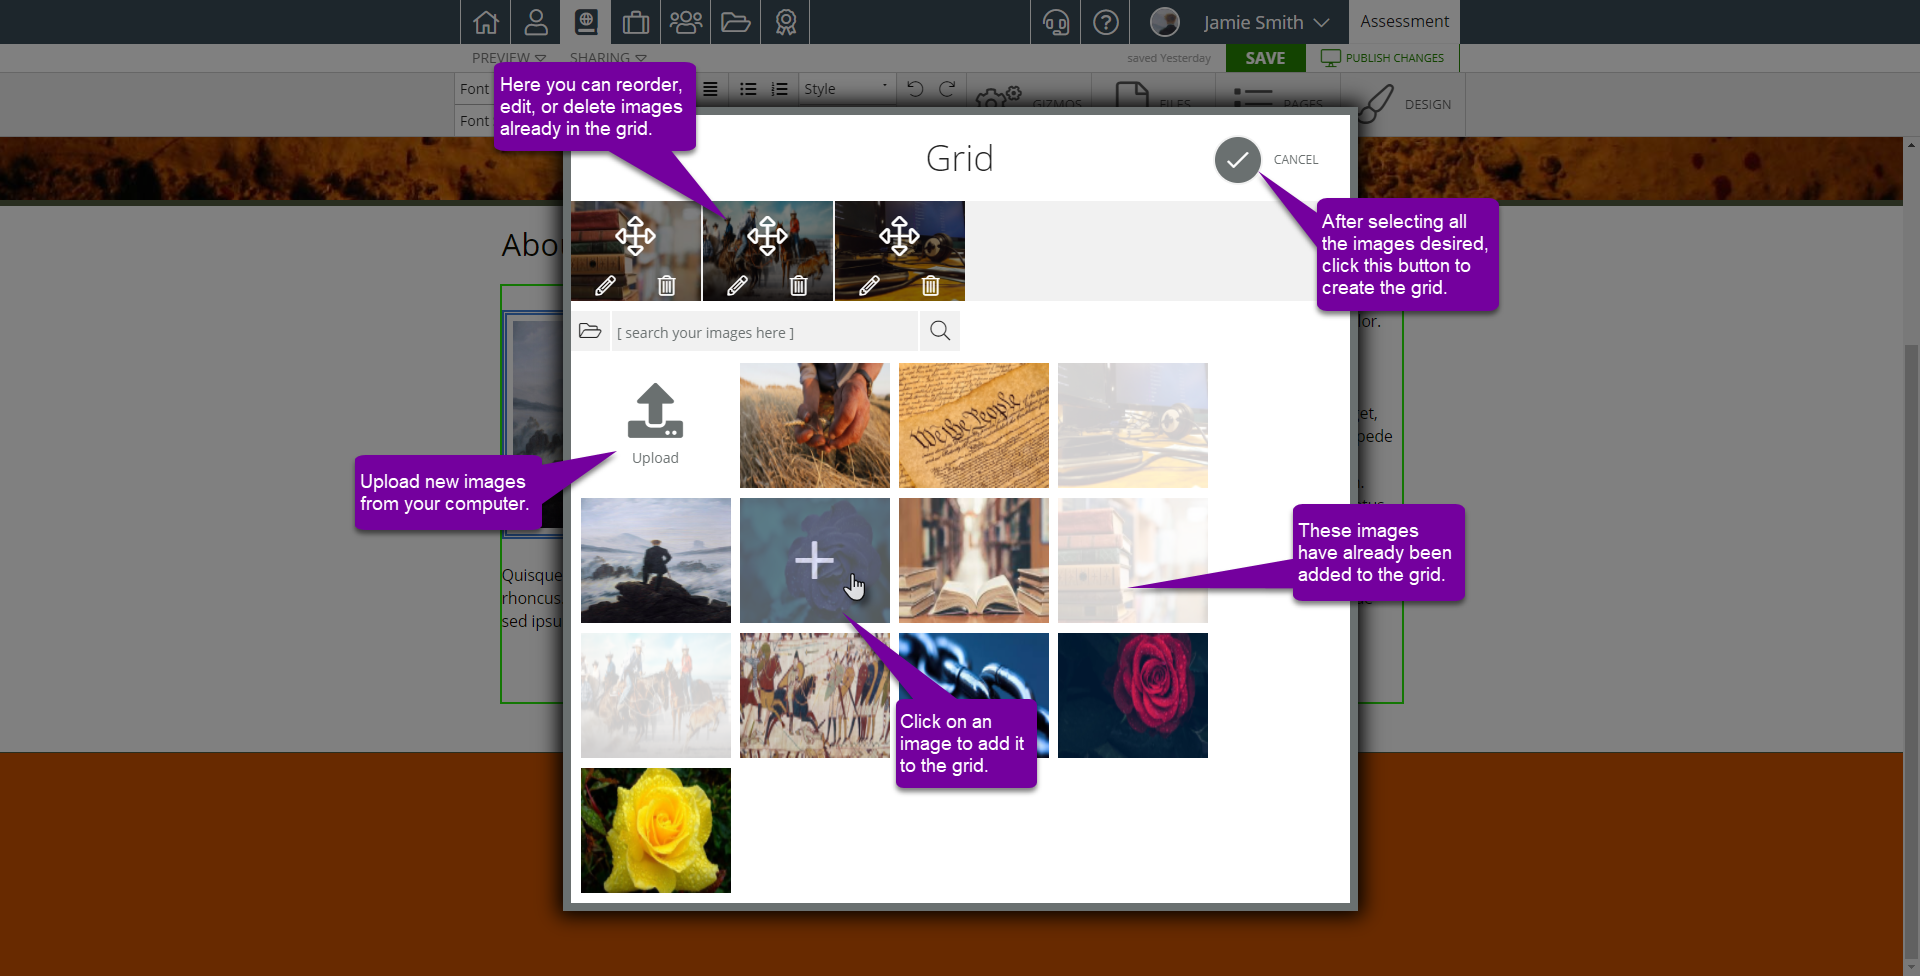
Now you can select the images you want to place in the portfolio. For each image selected, you can add a caption by clicking on the pencil icon. Type your caption, if desired, and click ok to save it. If you accidentally clicked on an image or decide you don't want one anymore, click remove to get it out of the list. When you are satisfied with your images, click on the check mark icon to create the grid in your portfolio.
Grid Editing Options
Once your grid is in the portfolio page, you have several other editing options. Not only can you change it to a slideshow or splat, but now you can adjust the size, spacing and borders of the gizmo. You can access these options by clicking on the grid to open the Gizmo Controls. In the top right, use the icon next to the x to crop and rotate your images.
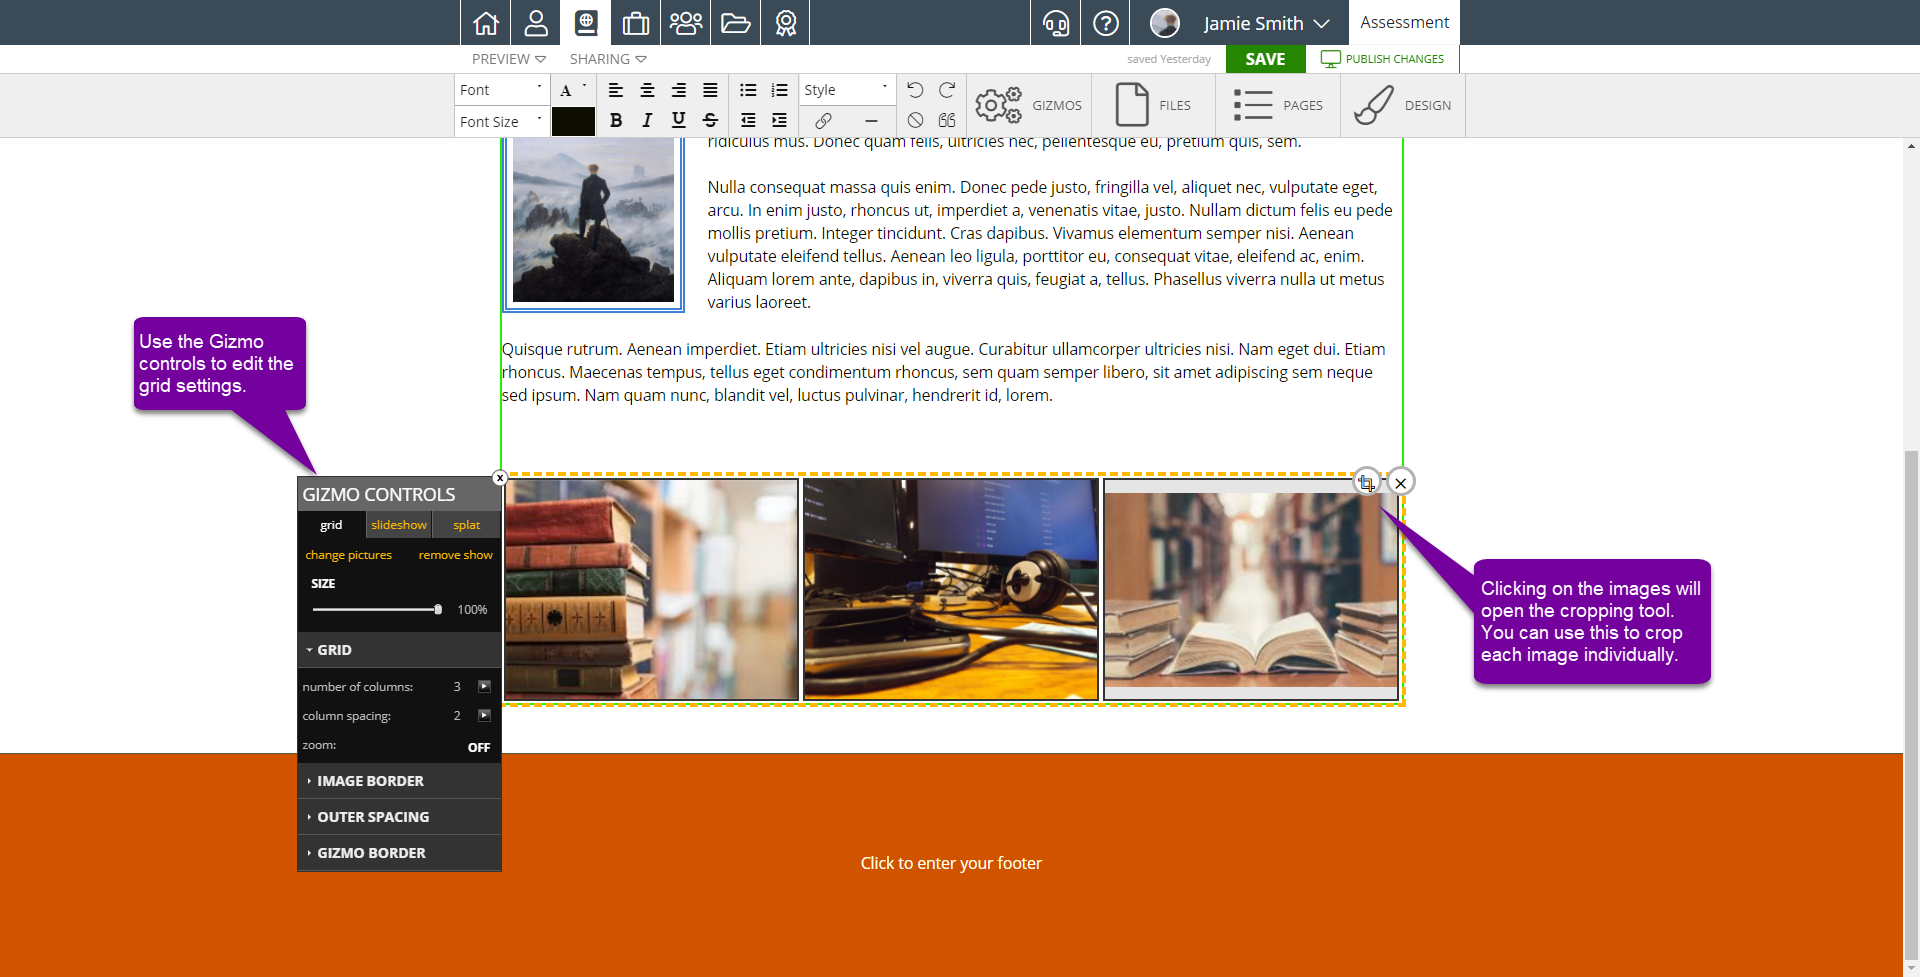
At the top of the Gizmo controls, you can switch to a Slideshow or Splat, these are ways of displaying your images. Check out the Slideshow Gizmo and Splat Gizmo pages for more information on each of these. In this area of the gizmo, you can also change the pictures that are shown and completely remove the grid from the page.
In the Grid options, you can select the number of columns and the space between each column in the grid. The zoom feature lets you display a close-up of the images you have selected. You cannot adjust which area of the images are shown in the zoom.
The Image Border section allows you to place a border around each image. You can set the size of the border, the color for the border, and determine the amount of space between the border and the image.
The Outer Spacing options allow you to set the margin around the gizmo, move the gizmo to the edge of its alotted space, and wrap text around the gizmo, if it is placed inside a paragraph.
You can also create a border around the grid using the Gizmo Border options. Here, you can choose the border size (this has to be done before the other options are made available), color, style, and determine the padding between the images and the gizmo border.