Sharing Projects
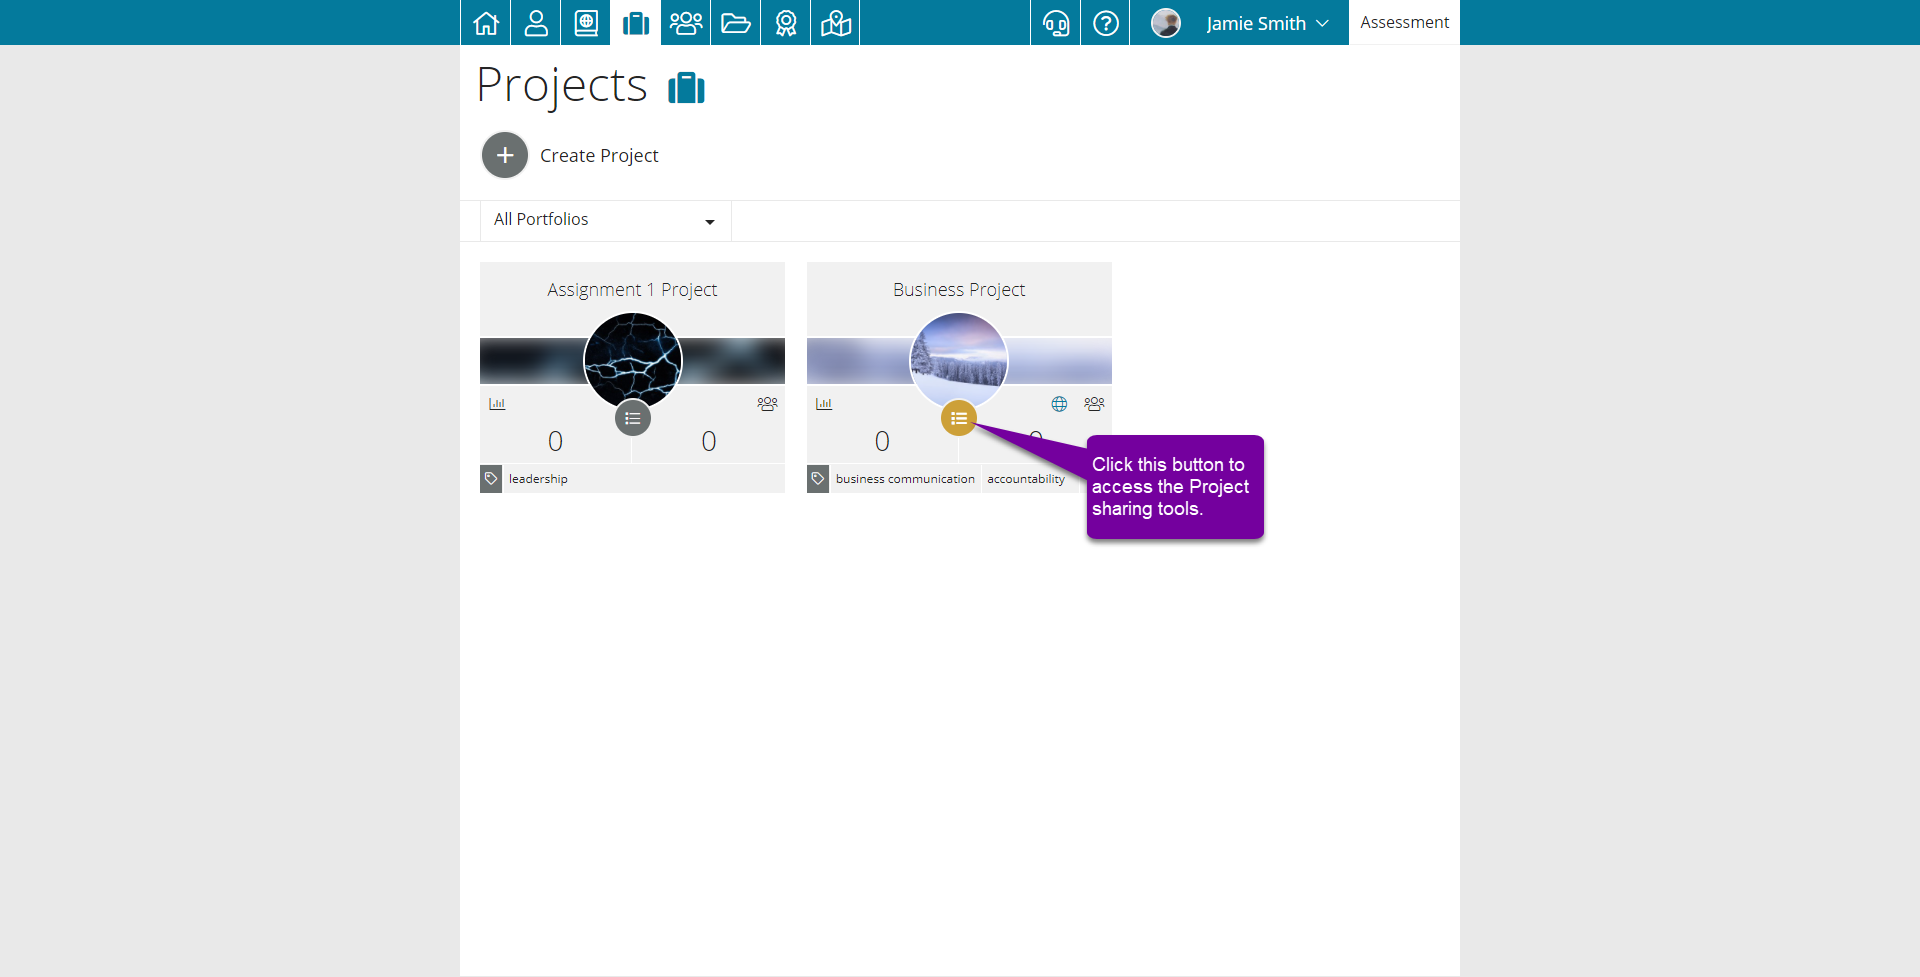
Sharing projects is a great way to showcase your work. You may be required to do this for a course, or you may want to share it with a prospective employer. Depending on your situation, you will need to use one of our three sharing options: Private, Community, or Public. To setup a share, first go to your Project Management page and click on the Actions button for your project.
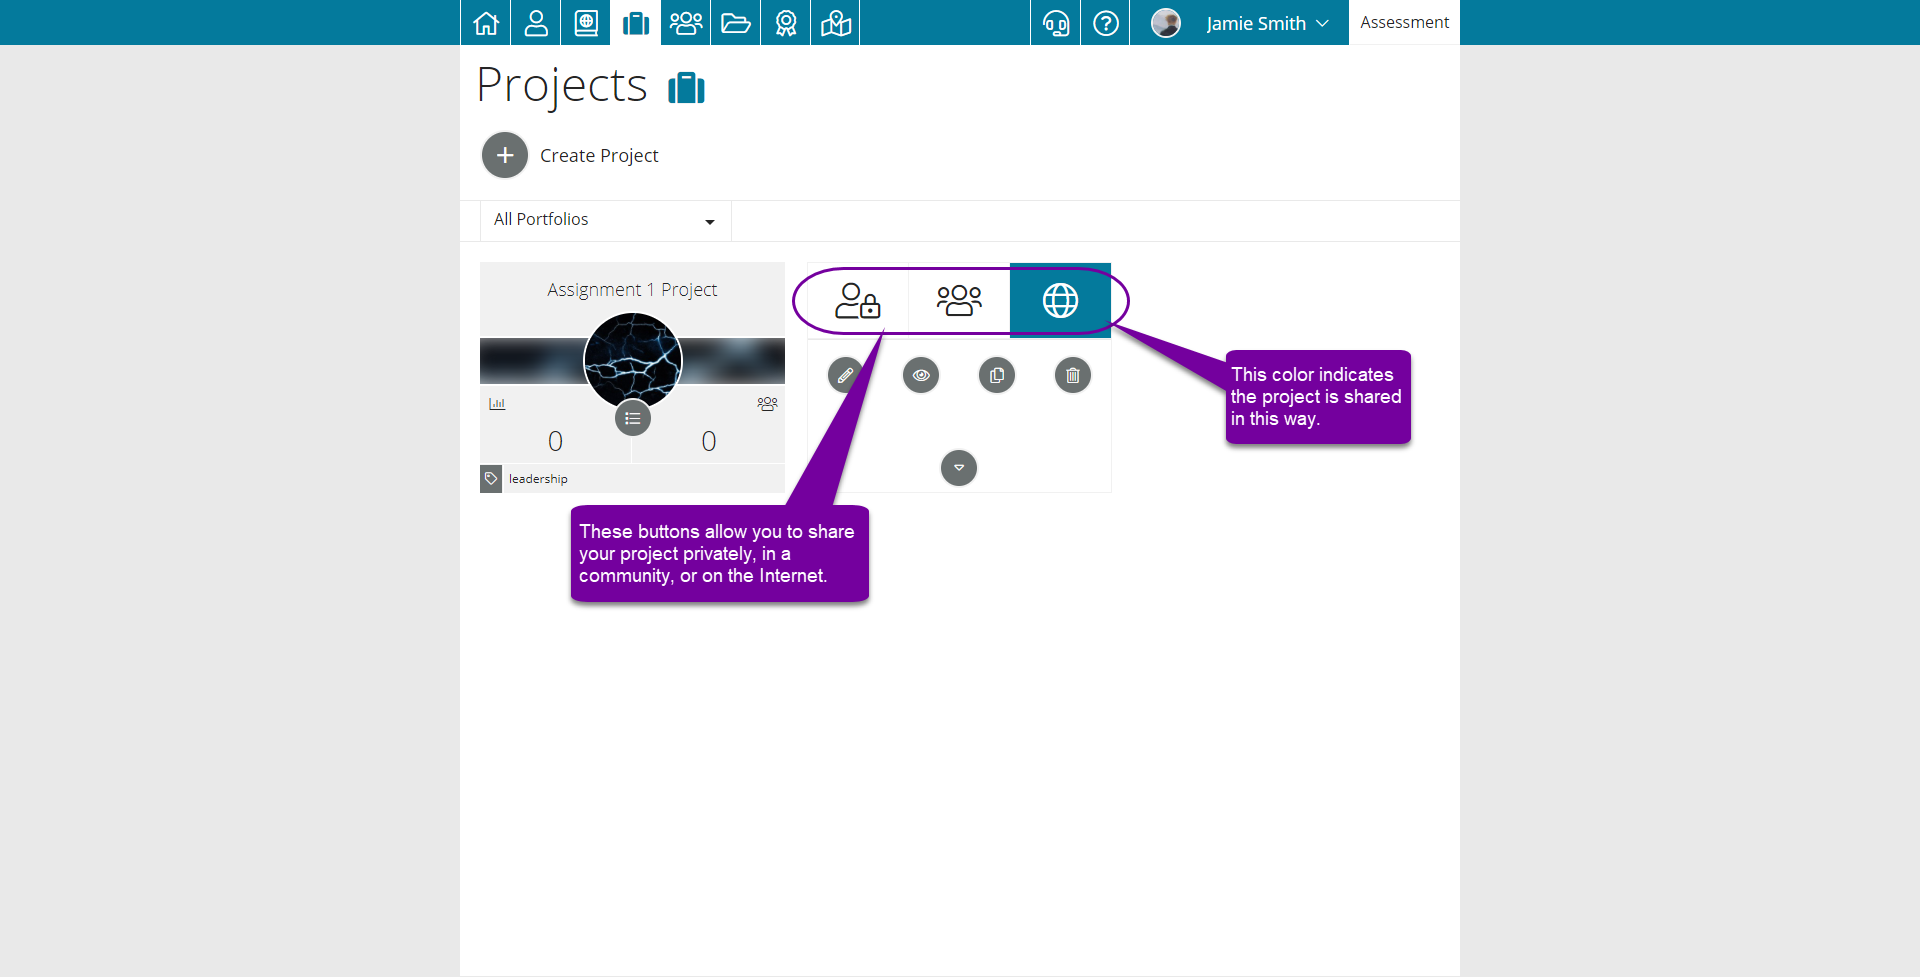
The actions button gives you access to various options; the top three options are for sharing. From left to right, the icons are for Private Shares, Community Shares, and Public Shares. Shaded icons represent shares that have already been setup. In the example below, a public share is active for this project.
Private Shares
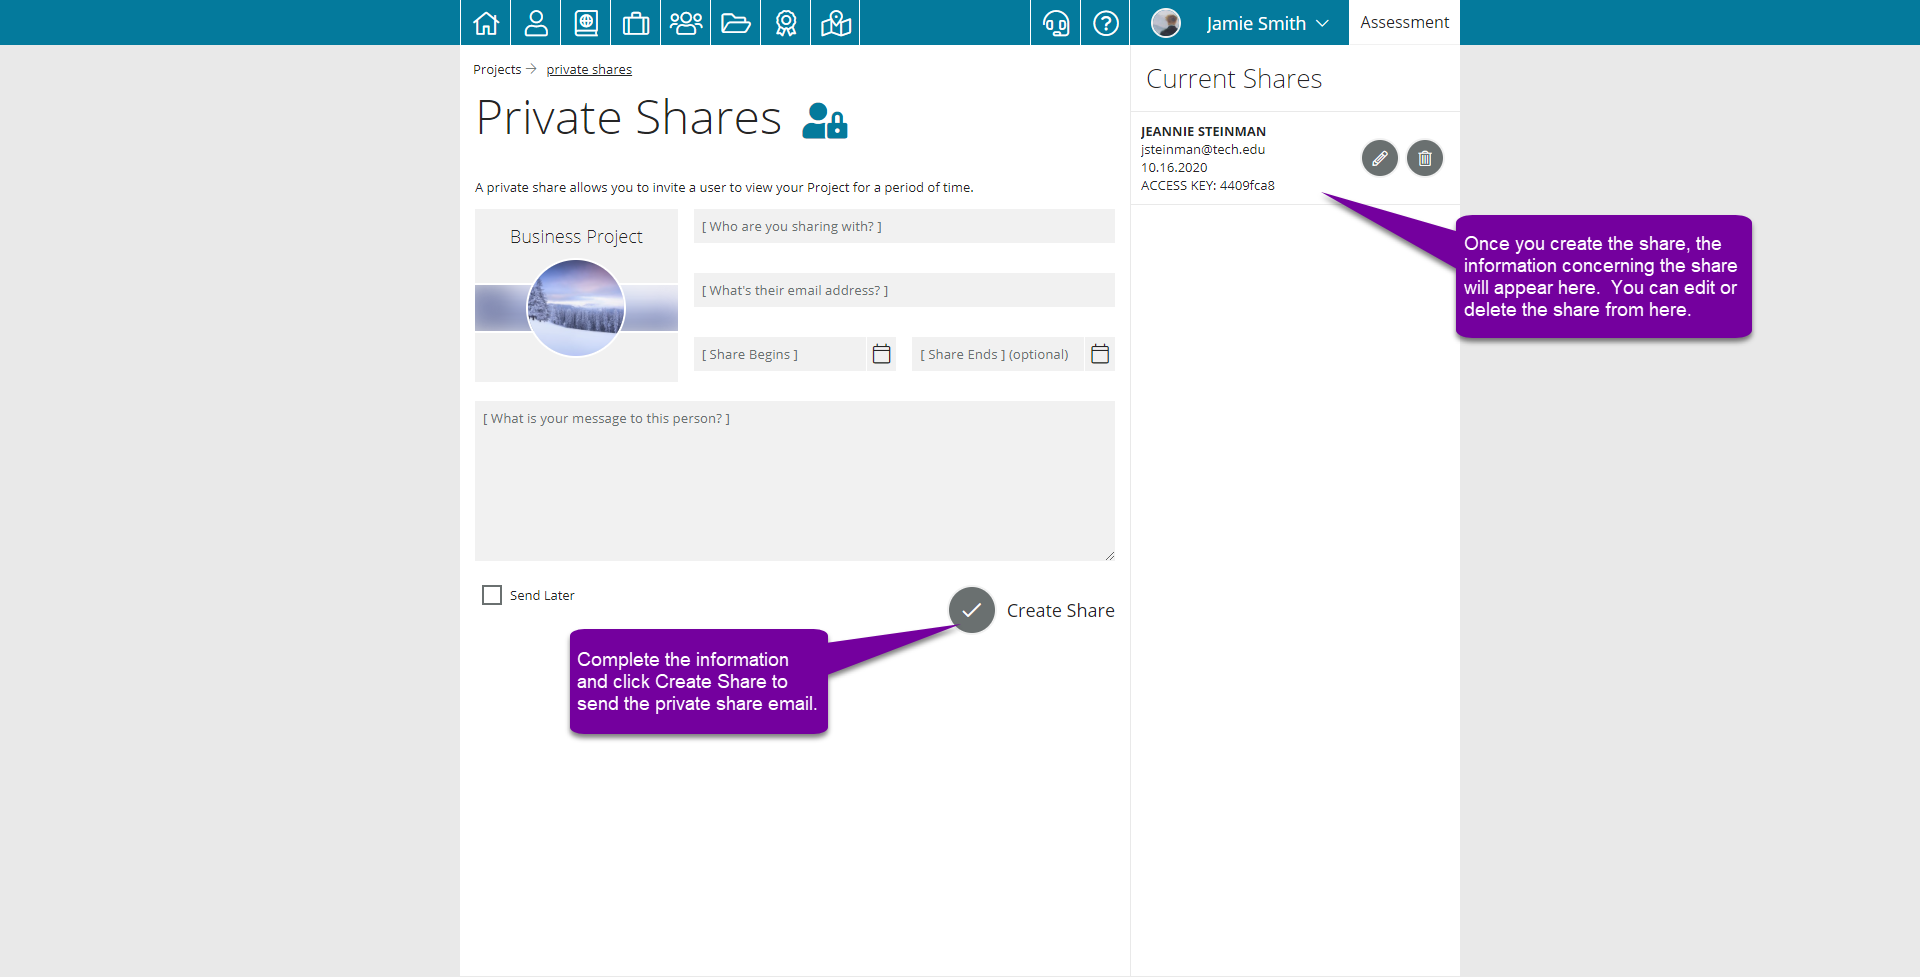
Private shares are setup with a name, email address, and a viewing period. These are perfect for sharing your project with an individual. To start a private share, click on the Private Share icon on the far left. On this page, you will need to fill out the required information and then click the Finish button in the bottom right. The share will send an email to the address you entered. In the email, there will be a link for the recipient to click on. They will be able to view the project during the time you choose for the viewing period. The veiwing period does not require an end date. If you would like to share the project indefinitely, just leave the end date blank. The recipient does not need a Foliotek account to view a private share. Any private shares that have already been setup will be listed on the right under Current Shares. You can edit and remove shares from there.
Community Shares
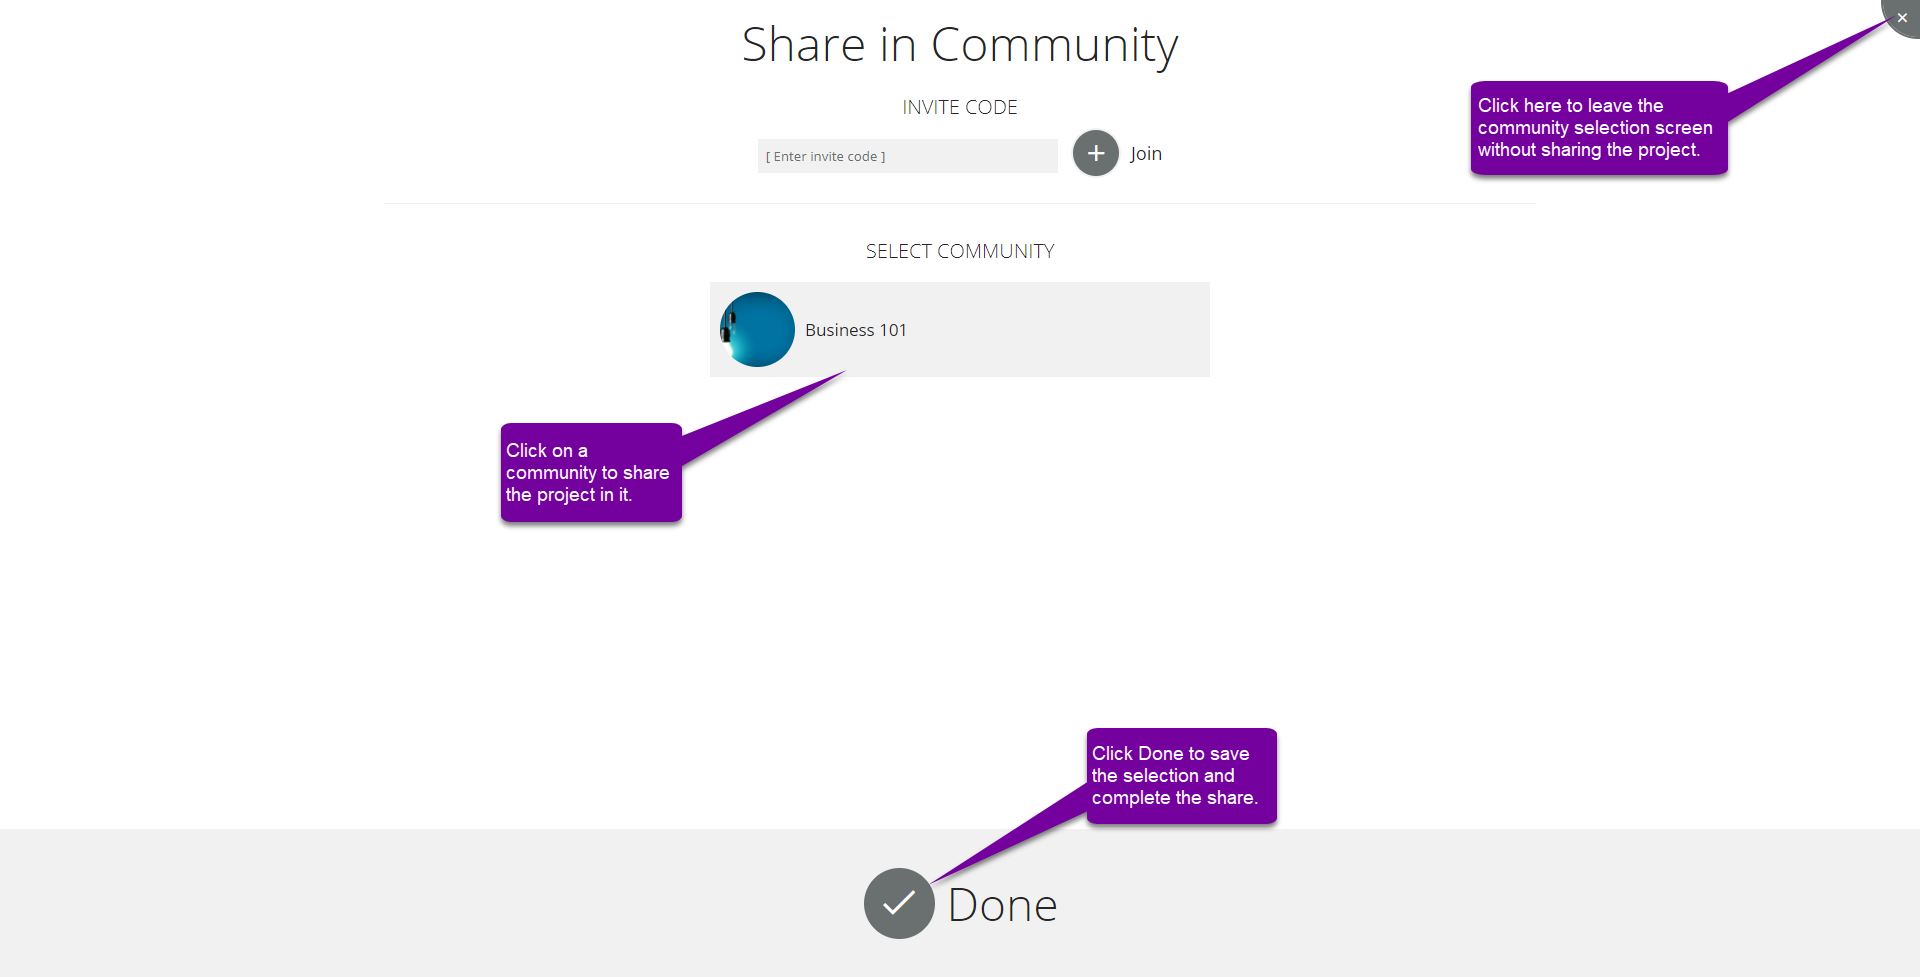
Community shares are usually for courses or other groups. To setup a community share, first go to the Project Management page, click on the actions button for your project, and select the People icon in the middle. Then, you will have the ability to select the community and click Done. If you are not a member of the community you need to share in, you will need to join it. You can join a community with an invite code from the moderator or by being added administratively. If you have the invite code, enter it above and click the Plus icon to join the community.
Public Shares
Public shares allow you to create a web address (URL) for others to use to view your project on the internet. Simply send the URL out to others and they will be able to view your project! To setup a public share, first go to the Project Management page and click on the actions button for your project. Then click on the Globe icon on the right. In the window that appears, choose Start Sharing Publicly.
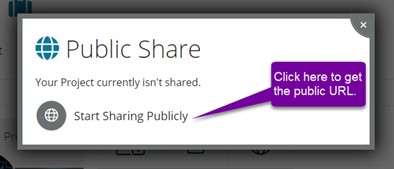
Now your share is ready! The URL for your project will be shown in the modal. You can use the sharing options there to share your project on various forms of social media. To stop sharing, simply click on the Globe icon again and choose Stop Share in the bottom right.
