Video Gizmo
Foliotek presentation allows you to add videos to your portfolio a number of different ways. One of these ways is using the Video gizmo. This is a gizmo found using the Gizmos tab on the toolbar.
Using the Video Gizmo
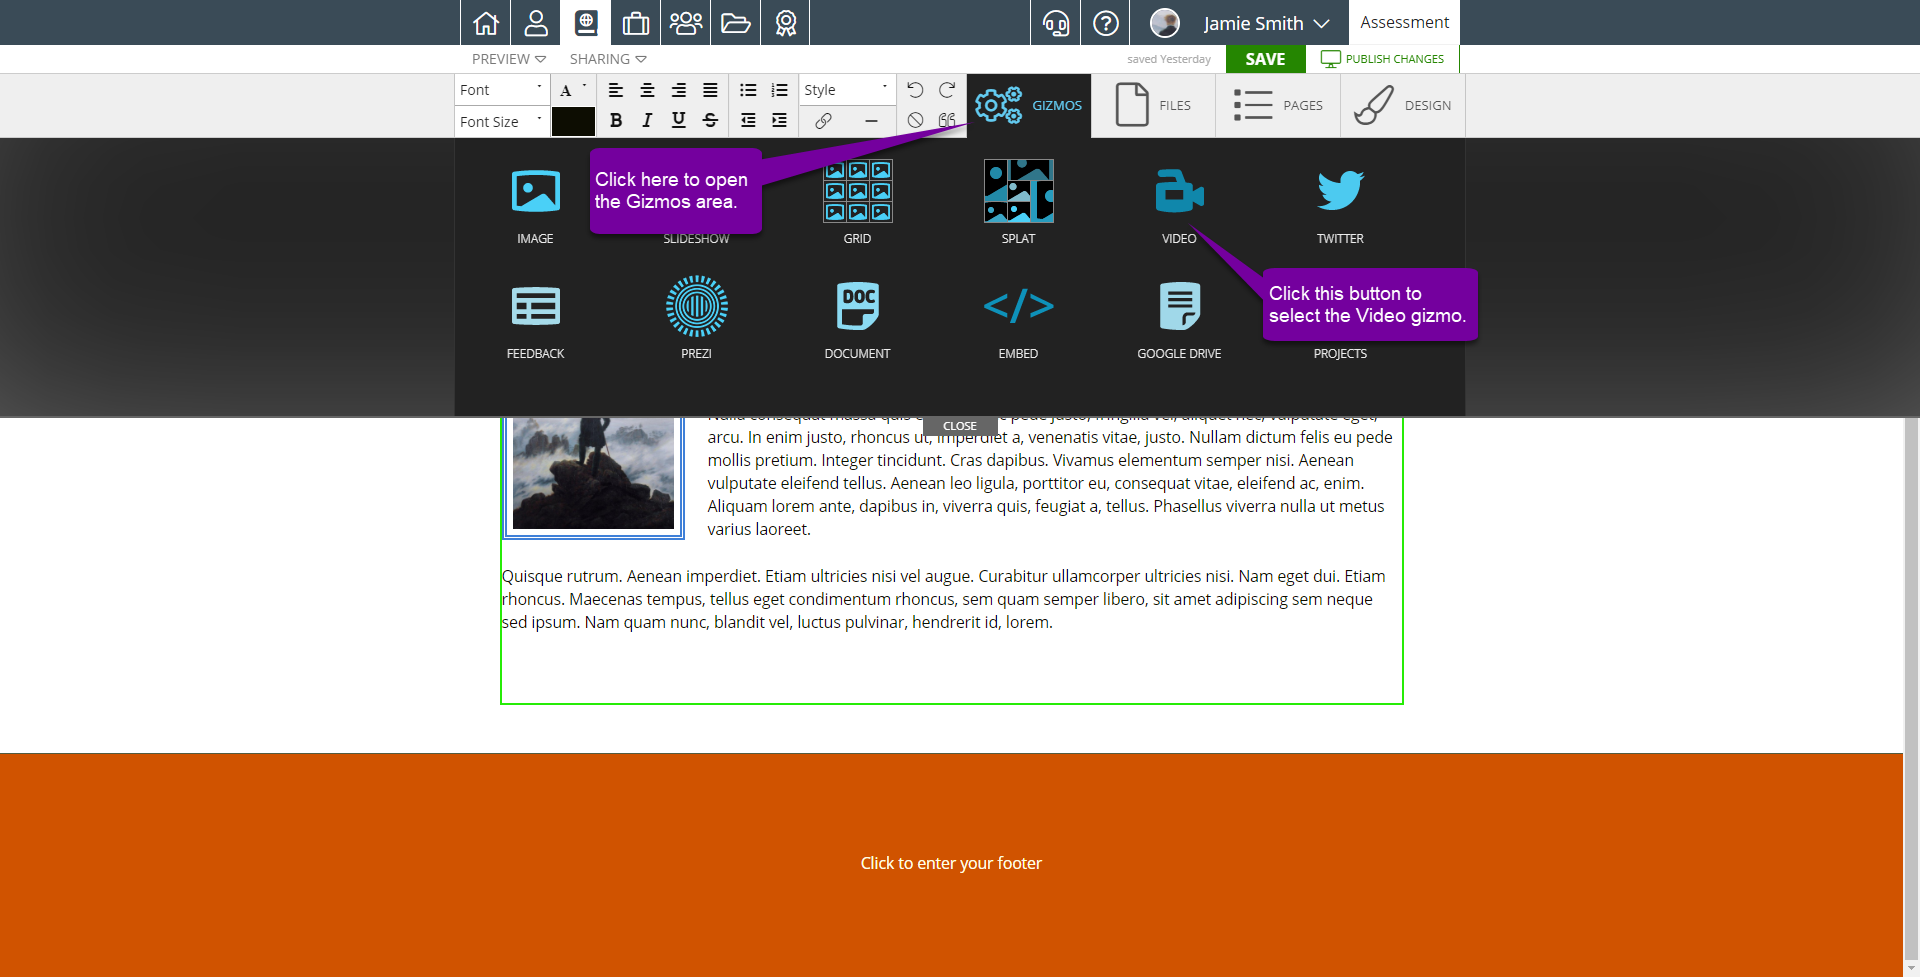
You'll find the Video Gizmo located with the rest of the Gizmos in the Gizmos tab on the standard content editor toolbar.
Once you find the Video gizmo, click once on the gizmo to "pick it up." There is no need to click and drag the gizmo, clicking on it once will "pick it up."
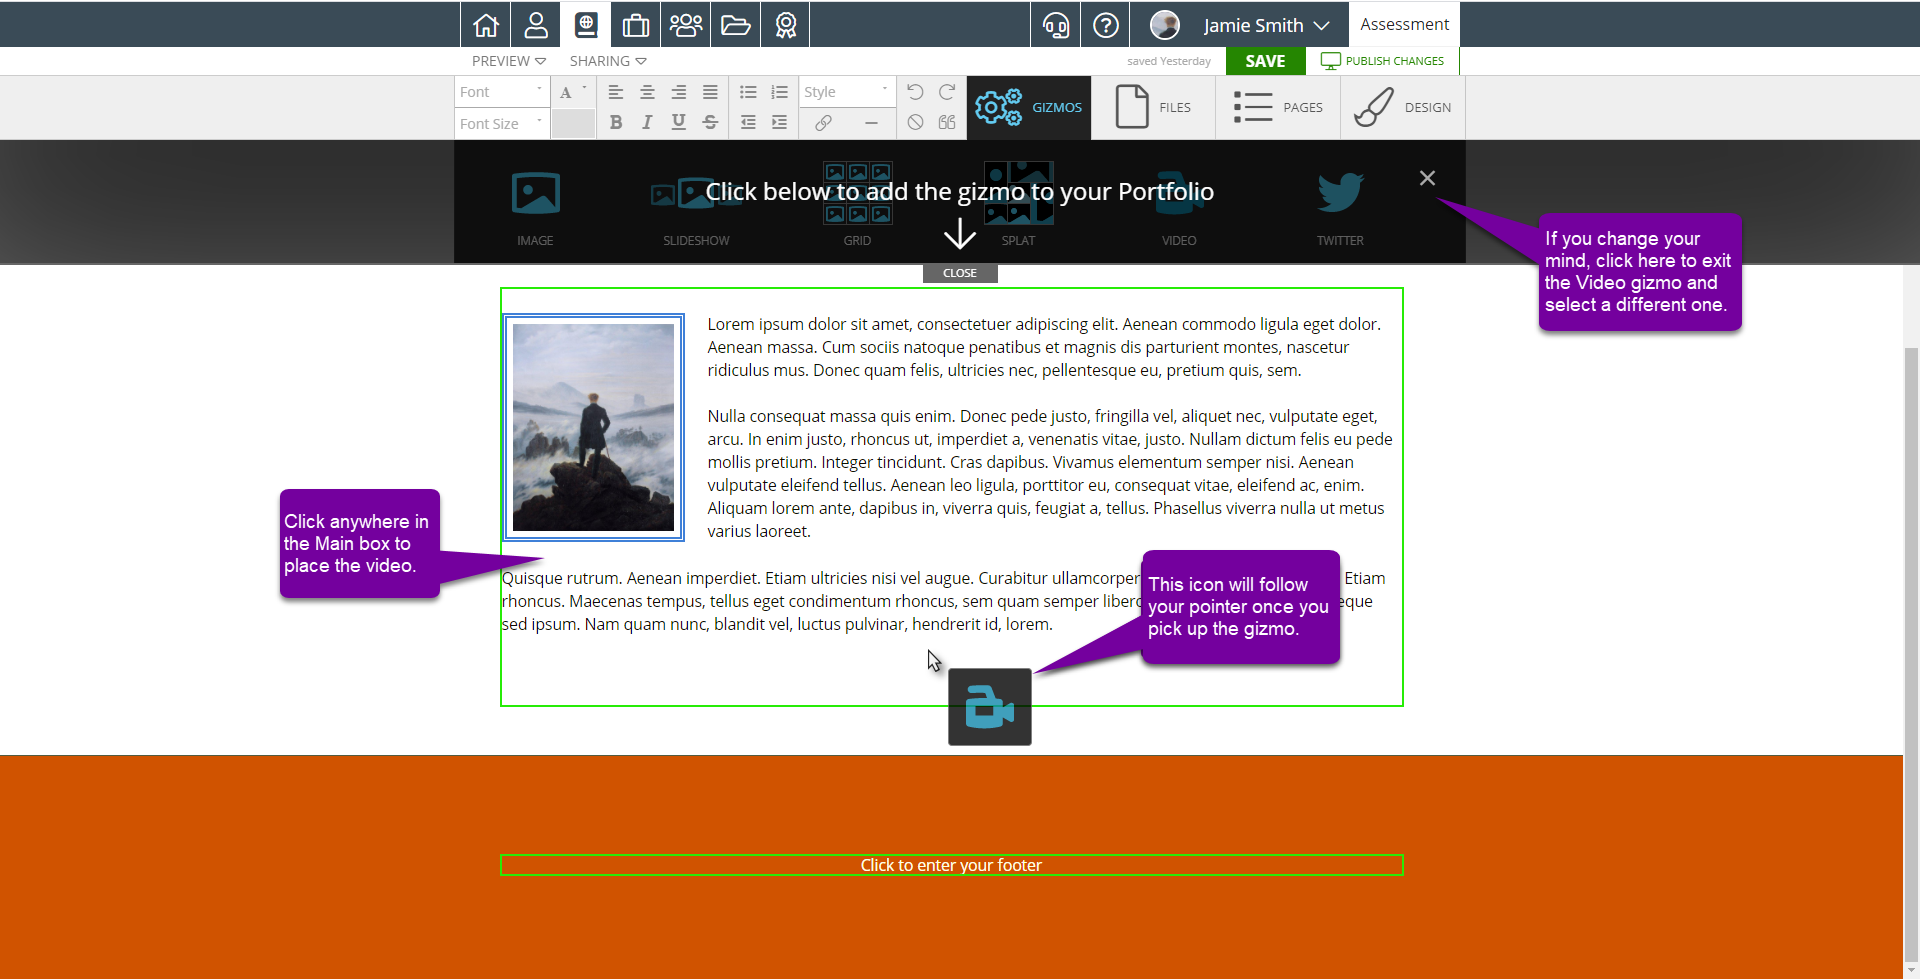
After you have picked up the Video gizmo by clicking on it, you can put it anywhere in the current portfolio page by clicking once again to place it. The available places to put the video will be outlined in green. Once you have placed it, you have two options. You can add a video you have uploaded into your Files area or you can add a video from the internet.
Adding Videos
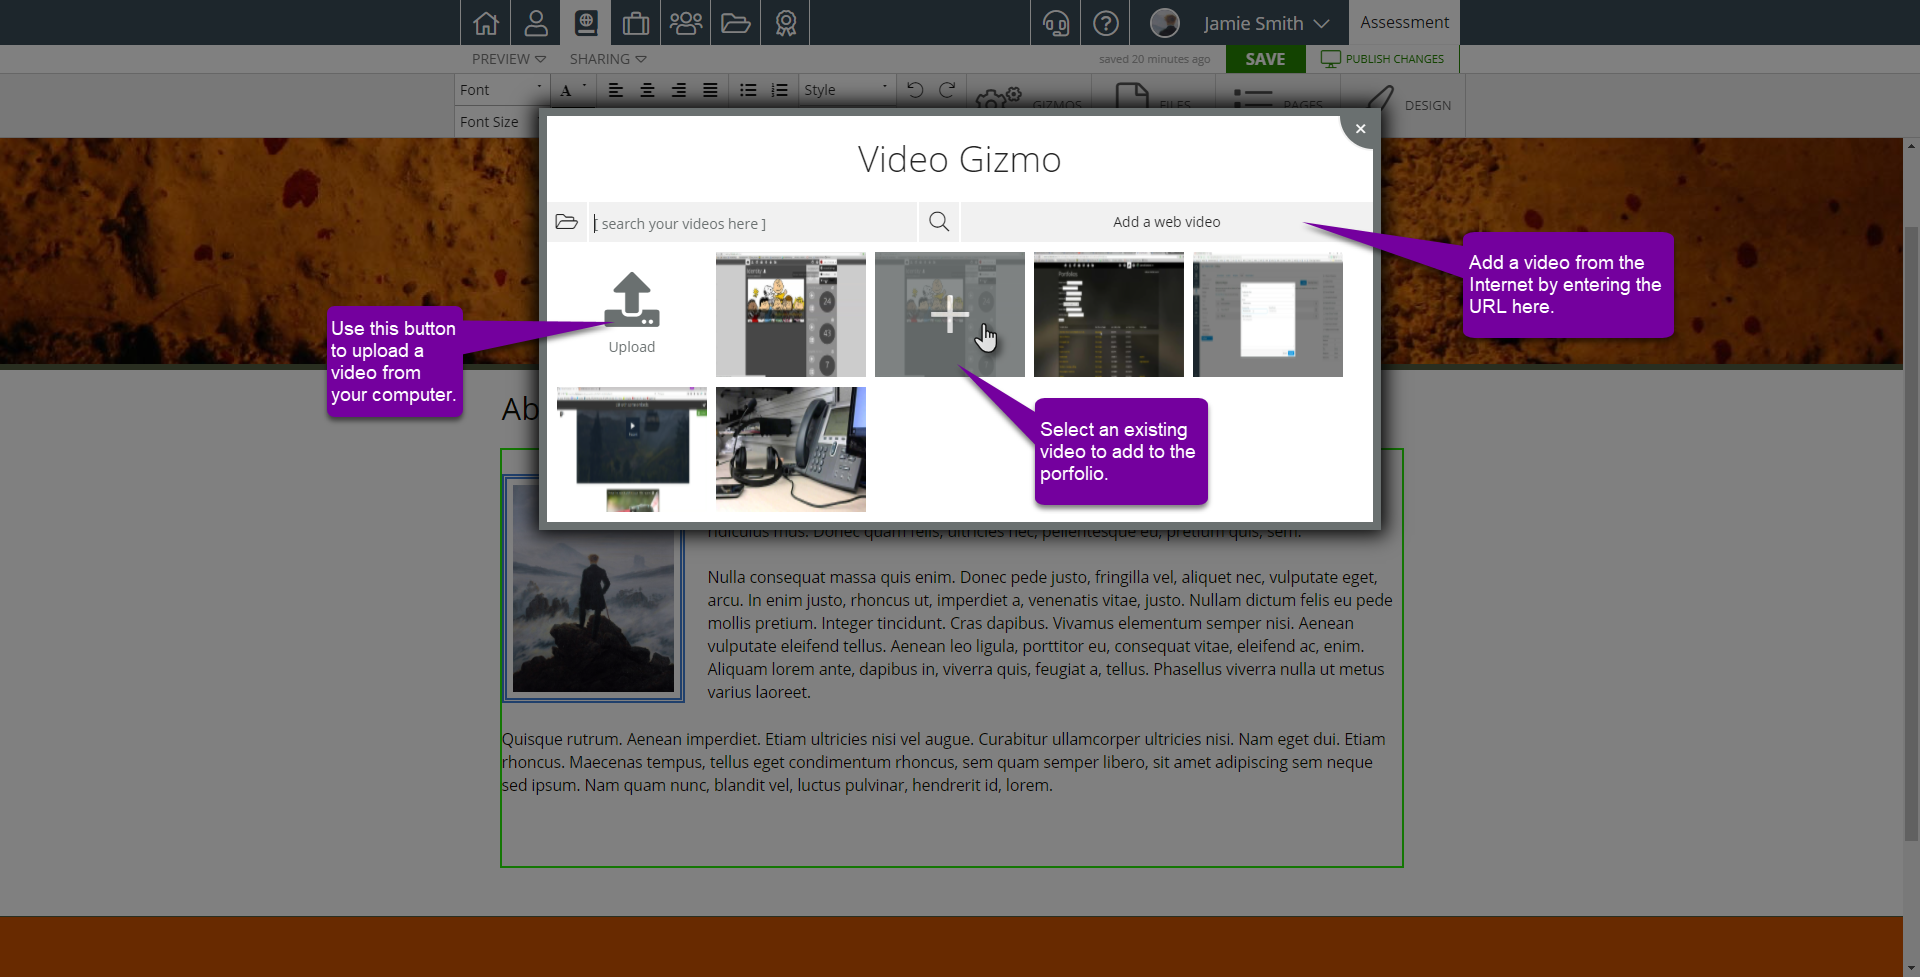
If you want to add one of your personal videos, all you need to do is click on the thumbnail of the video that appears in the gizmo or use the Upload button to add a video directly from your computer. If it is a video from the web, click on Add a Web Video. You'll be prompted with a textbox to enter the URL for the video. Enter the video URL, then click the check mark button.
Video Editing Options
Once your video is in the portfolio page, you have several other editing options. You can adjust the size, spacing and borders of the gizmo. You can access these options by clicking on the video placeholder to open the Video Controls.
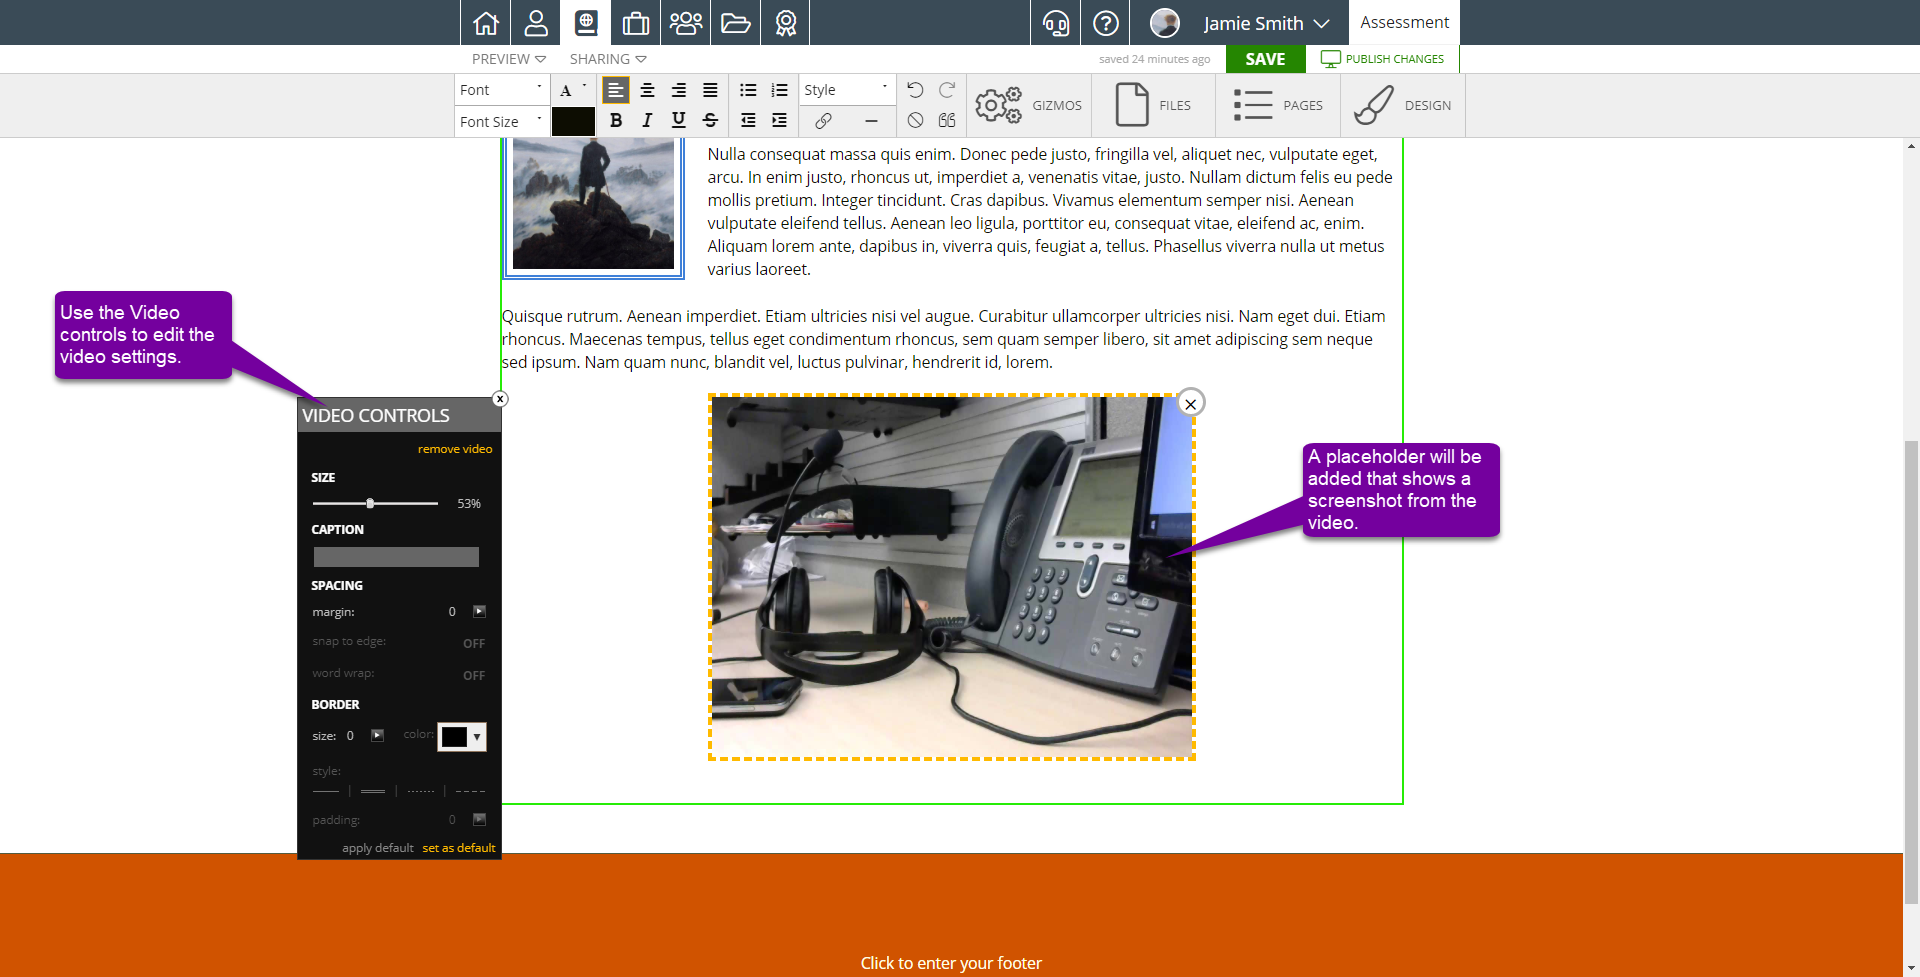
The remove video link will remove the video from your portfolio. Once this is done, it cannot be undone. You will have to re-add the video to bring it back.
The slider under SIZE allows you to change the size of your video. 100% is the original size and anything smaller is just a reduced, proportionate size.
The CAPTION option allows you to add text that will become the caption for the video. Captions are displayed under the video, separate from other text on the page.
Under SPACING, you see options for margin, snap to edge, and word wrap.
- Margin is the space between the video and everything else on the page. The margin will be equally increased around all sides of the video.
- Turning on snap to edge will allow the video to snap to the edge of the content box (outlined in green in the editor), ignoring any margin on that side.
- Word wrap allows for text to be beside the video. When word wrap is off, the entire line where the video is placed cannot have text on it.
The BORDER features allow you to add a border around the video and adjust the size, color, style, and padding of that border.
- Size allows you to change the thickness of your border. The larger the size, the thicker the border will be.
- Color allows you to set the color for your border. You can choose the color by using the selector that pops up. The left most box allows you to choose a shade of a color, while the slider to the right of that box allows you to choose the starting color.
- There are four border styles to choose from: single line, double line, dotted line, and dashed line. Choosing a style will change the look of the border around the entire video.
- Padding allows you to put space between the border and the video. The greater this number, the larger the space. Just as in margin, this space is distributed evenly to all sides of the video.
If you plan on using a particular formatting multiple times, you may choose to set the style as your default. Once you've set all the feautres the way you want them, click set as default to make that style the default. For future videos, select apply default to apply the default formatting to the new video. If you wish to change certain aspects of the formatting on the new video, you may do that also. Doing so will not affect the original video.